Pre Move Out Inspection: Your Guide to a Smooth Turnover
Master the pre move out inspection with our complete guide. Learn timing, legal rules, and how to use checklists and photos to prevent deposit disputes.

If you’re staring at an upcoming vacancy and hoping the place comes back “more or less fine,” that’s usually the moment problems start. The expensive surprises rarely show up when the tenant gives notice. They show up after the keys are returned, the unit is half-cleaned, a contractor is waiting on your answer, and your next listing is delayed because nobody got clear on what needed fixing.
A good pre move out inspection changes that. Done well, it’s not a bureaucratic checkbox. It’s an early conversation, a record-building exercise, and a turnover planning tool. For small landlords, that combination matters more than most realize.
Why the Pre-Move-Out Inspection Is Your Best Defense
The worst move-outs share the same pattern. The tenant leaves. You walk in. The oven is dirty, the walls need patching, the bathroom has been neglected, and now every decision is reactive. You’re estimating deductions, fielding pushback, and trying to turn a unit at the same time.
A pre move out inspection gives you an advantage before that happens.

This inspection is different from the final walkthrough. The final walkthrough is about confirming condition after possession ends. The pre move out inspection is about communication while the tenant still has time to fix things. That distinction matters because many disputes aren’t really about major damage. They’re about missed expectations, poor documentation, and small issues that no one addressed early.
The financial reality is stark. Data cited in this move-out inspection guide shows that 24% of renters lose their entire security deposit, and over 51% lose part or all of it. Those numbers tell you something important. Move-out conflict isn’t rare. It’s a routine part of rental operations when landlords wait too long to inspect.
What the inspection actually prevents
A lot of new landlords treat this step as a hunt for deductions. That’s the wrong mindset. The practical value is in preventing avoidable work from landing on your schedule.
Use the inspection to identify issues like:
- Cleaning problems: Grease buildup, dirty appliances, stained tubs, and neglected floors.
- Minor repairs: Holes from wall mounts, broken blinds, loose hardware, damaged door stops.
- Move-out logistics: Abandoned furniture, key return confusion, and unfinished patchwork.
- Turnover planning: Whether you need a cleaner, handyman, painter, or nobody at all.
Practical rule: If a tenant can still fix it before move-out, raise it during the pre move out inspection, not after.
That one shift changes the tone. Instead of arguing later about charges, you’re giving the tenant a chance to solve the problem. That’s fair to them, and it’s efficient for you.
Why this works better than a strict deposit-first approach
Landlords often assume a tough stance protects them. In practice, surprise deductions create resistance. Clear advance notice gets better results. If the tenant sees a written list, understands what counts as cleaning versus damage, and has time to act, the property usually comes back in better shape.
If you want to set expectations without sounding adversarial, it helps to send tenants practical prep materials. A checklist like these tips to get your deposit back gives renters concrete standards for appliances, surfaces, and overlooked areas that often trigger deductions.
It also helps to view inspections as part of retention and turnover strategy, not just deposit management. A smoother move-out process can reduce friction at the end of tenancy and support better operating rhythm across your portfolio, which is one reason many owners focus on broader systems to reduce tenant turnover.
Navigating the Legal Timeline and Tenant Communication
Bad inspections often fail before anyone opens the front door. The landlord sends notice too late, uses the wrong language, or schedules the inspection in a way that doesn’t match state rules. Then the whole process becomes vulnerable if the tenant challenges your deductions.
Timing matters as much as the walkthrough itself.

In many markets, landlords conduct a pre move out inspection during the final stretch of the tenancy. The exact window depends on local law and the lease. California is a good example of how precise this can get. This explanation of California pre-move-out inspection rules notes that the law requires a 14-day notification window and at least 48 hours written notice of the specific inspection date and time. It also notes that failure at any stage can invalidate the inspection and expose landlords to legal liability.
A practical timeline that keeps you organized
For a small landlord, the simplest way to stay compliant is to treat the inspection as a sequence, not a single event.
- Review the lease first. Check the move-out clause, notice requirements, cleaning expectations, and any language on access.
- Check state and local rules. Don’t assume your general entry notice rule covers pre move out inspections.
- Offer the inspection early enough. Give the tenant time to participate and enough runway to address issues.
- Confirm in writing. Verbal scheduling creates memory problems later.
- Conduct the walkthrough with the tenant if possible. That reduces disputes about what was said and seen.
- Deliver a written itemized list promptly. Make it specific enough that the tenant can act on it.
What cooperative communication sounds like
Tone makes a difference. If your message sounds like a threat, tenants will often become defensive before you even arrive. If it sounds procedural and fair, most will engage.
You don’t need polished legalese. You need clarity.
The inspection should feel like a chance to fix issues early, not a surprise audit.
A simple message can be enough:
Hi [Tenant Name], since your move-out date is coming up, I’d like to schedule a pre move out inspection. The purpose is to review the unit together, identify any cleaning or repair items, and give you a chance to address them before the final walkthrough. Please let me know which of these times works best for you: [option 1], [option 2], [option 3].
If your state requires a formal offer or notice, use the legally required language and send it in the required format. Then follow up with a plain-English message so the tenant understands what to expect.
Common timeline mistakes that create trouble
The most common errors are operational, not malicious:
- Late notice: You remembered the inspection only after the move truck was booked.
- No written confirmation: You discussed it by text or phone but didn’t document the details clearly.
- Vague findings: “Needs cleaning” isn’t useful. “Inside oven, refrigerator shelves, and bathroom grout need cleaning” is.
- Using one generic process for every property: Different states impose different requirements.
If you manage even a small portfolio, keep one state-specific checklist for notices, inspection timing, and deposit handling. A good place to start is reviewing your broader security deposit laws for landlords, then aligning your inspection workflow to those rules.
Your Complete Room-by-Room Inspection Checklist
A solid pre move out inspection is methodical. Don’t wander the unit and trust your memory. Go room by room in the same order every time. That consistency helps you stay fair, helps the tenant follow along, and makes your final notes easier to use.
Before you begin, compare current condition to the move-in report if you have one. Without that baseline, normal aging and tenant-caused damage are harder to separate.
Damage vs normal wear and tear
Many landlords face issues when dealing with these situations. If you treat every imperfection as chargeable damage, you invite a dispute. If you ignore actual damage because you’re unsure, you eat avoidable turnover costs.
| Item | Normal Wear and Tear Example | Tenant-Caused Damage Example |
|---|---|---|
| Walls | Minor scuffs, small picture-hanging marks, slightly faded paint | Large holes, unauthorized paint, heavy gouges |
| Flooring | Light wear in high-traffic areas, minor surface dullness | Burns, deep scratches, stains, broken tiles |
| Carpet | General flattening from use | Rips, strong stains, pet damage |
| Doors and trim | Slight loosening from age, minor surface wear | Broken frames, holes, missing hardware |
| Appliances | Ordinary aging and light cosmetic wear | Broken shelves, missing parts, misuse-related damage |
| Fixtures | Gradual wear on handles or hinges | Cracked fixtures, bent hardware, missing covers |
Landlords don’t win disputes by finding more problems. They win by classifying problems correctly.
Kitchen
The kitchen usually tells you how the rest of the turnover will go. If the tenant cleaned it well, the property is often in decent shape overall. If the kitchen is neglected, expect other issues.
Check these items carefully:
- Appliances: Open the oven, refrigerator, dishwasher, and microwave. Look inside, not just at the exterior.
- Cabinets and drawers: Check for grease, broken hinges, shelf liner residue, and missing hardware.
- Counters and backsplash: Look for burns, chips, stains, and caulk deterioration.
- Sink area: Test faucet function, inspect for leaks under the cabinet, and note disposal issues if applicable.
- Flooring: Watch for sticky residue, water damage near the sink, and gouges from moving appliances.
If you want to send tenants a practical prep resource instead of a vague “clean thoroughly” message, this stress-free end of lease cleaning checklist is useful because it breaks out commonly missed cleaning tasks in plain language.
Bathrooms
Bathrooms create a lot of friction because cleaning and damage can overlap. Soap scum, mildew, and hard-water buildup may look minor in photos but still delay your turnover if they require deep cleaning.
Inspect:
- Tub and shower: Stains, cracked tile, missing grout, damaged caulk, slow drains
- Toilet: Cleanliness, secure mounting, tank lid condition
- Vanity and sink: Cabinet moisture damage, cracked counters, fixture operation
- Mirror and lighting: Missing bulbs, cracked covers, loose fixtures
- Ventilation: Dust buildup and signs of moisture-related neglect
Don’t rush this room. Bathroom problems can expand into maintenance calls after move-out if you miss leaks or failing seals.
Living areas and bedrooms
These spaces seem simple, but they generate the most debate about wear and tear.
Focus on:
- Walls: nail holes, anchor damage, patch jobs, unauthorized paint
- Floors: scratches, stains, lifted edges, broken transitions
- Windows: cracked glass, damaged screens, missing blinds
- Closets: shelf damage, sliding door function, leftover belongings
- Ceilings and doors: stains, dents, damaged stops, hinge issues
A room that is merely lived in should not be treated the same as a room that was neglected or altered.
General systems and exterior items
Finish with the parts landlords often forget until the next tenant complains.
Review the basics:
- Smoke detectors and batteries
- Light fixtures and switch plates
- HVAC filter condition and vent covers
- Keys, remotes, and access devices
- Patio, balcony, storage, garage, or yard areas if included in the lease
For a more formal inspection format, it helps to adapt a repeatable property inspection checklist for landlords so you’re not reinventing your process at every vacancy.
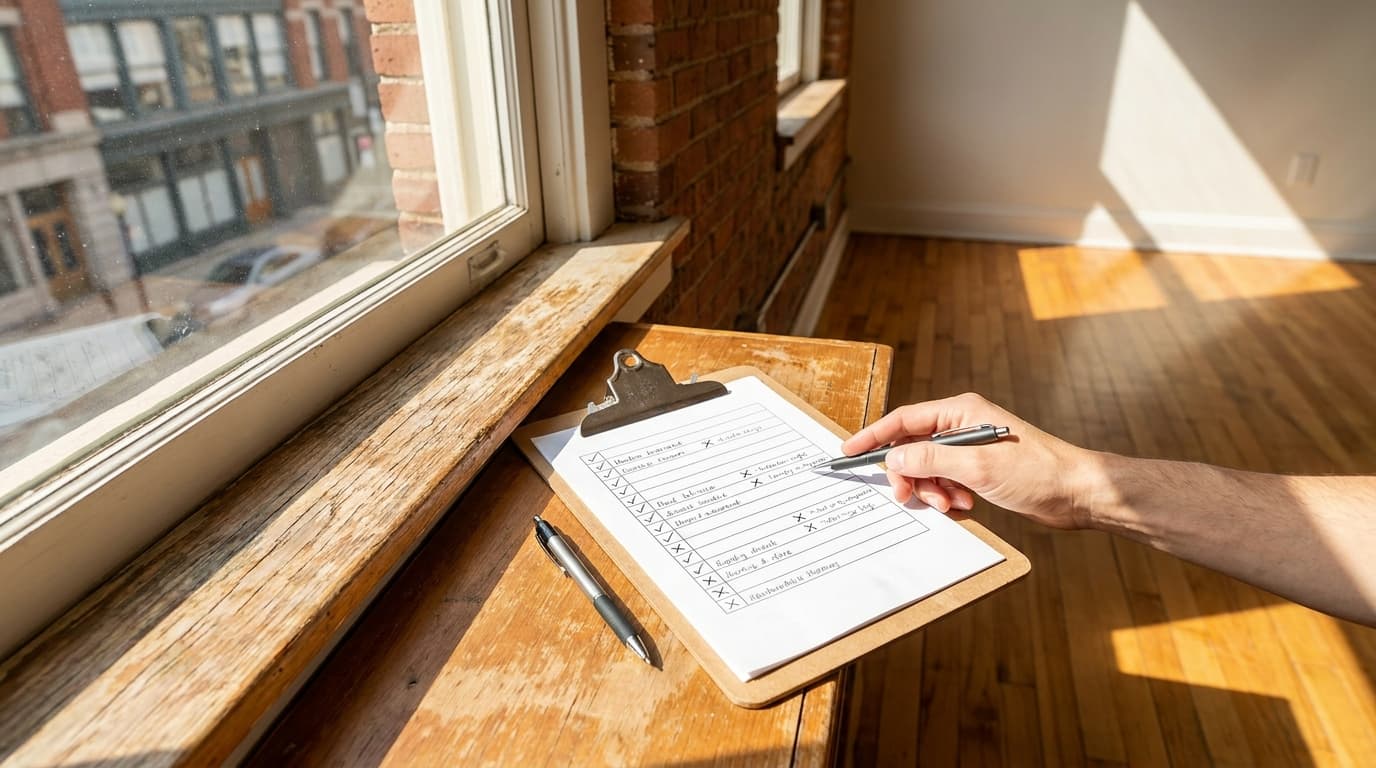
Creating Bulletproof Documentation with Photos and Notes
Most inspection disputes don’t turn on whether you noticed the problem. They turn on whether you documented it well enough to prove what you saw, where it was, and how serious it was.
That’s why “take some pictures” isn’t good enough.

Industry surveys cited in this move-out inspection best practices article show that 41% of apartment residents receive their full security deposit back, and the same source says that full-recovery rates climb with digital tools and thorough room-by-room documentation. That’s a useful reminder that documentation isn’t just defensive for landlords. It creates clarity for both sides.
Use the three-photo method
For every issue worth noting, take three images:
- Wide shot: Shows the full room or wall so location is obvious.
- Medium shot: Frames the damaged item or affected area.
- Close-up: Captures the exact defect, stain, crack, or hole.
This sequence matters because close-ups alone are easy to challenge. A tenant can say the mark was tiny, in a hidden place, or unrelated to the deduction. The wide shot solves that problem.
Pair every image with a written note
Photos without notes create another kind of confusion. Months later, you may have ten images of scuffed walls and no idea which bedroom each one came from.
Your note should answer four questions:
- Where is it?
- What is it?
- Does it appear to be wear or damage?
- What action is needed?
A note like “Bedroom 2, east wall, two large anchor holes and failed patch, repaint needed” is far better than “wall damage.”
Documentation rule: If someone else can’t understand your file without calling you, your record isn’t finished.
Video helps, but only if you narrate clearly
A continuous walkthrough video is useful when the unit is close to move-out ready and you want a broad condition record. It’s less effective if you move too fast or don’t explain what the camera is showing.
If you use video, narrate in plain terms. Identify the room, describe the condition, and pause at any item that may matter later. Don’t rely on video to replace still photos. Use it to support them.
What a defensible file looks like
A strong inspection file usually includes:
- Date-stamped photos
- A written checklist by room
- A short summary of tenant-correctable items
- Any messages confirming the inspection date
- A copy of the written itemized list sent after the inspection
When landlords lose “he said, she said” deposit disputes, it’s often because they had opinions, not records. The inspection itself is only half the job. The file you build from it is what protects your decision-making later.
How VerticalRent Streamlines Your Inspection Workflow
Manual inspections break down in small, predictable ways. Photos stay on one phone. Notes are scribbled on paper. The tenant texts a video to one number, an update to another, and a contractor estimate arrives in someone’s inbox without being tied back to the original issue.
That mess slows turnover.
A more digital workflow solves two problems at once. It keeps your inspection record organized, and it shortens the time between identifying a problem and fixing it. That matters because a 2025 NAR survey cited in this article on pre-move-out inspection delays and AI-powered walkthroughs found that 42% of independent landlords report 2-4 weeks of average vacancy due to slow turnovers, and 35% attribute downtime to inspection delays. The same source says AI-powered preliminary virtual walkthroughs can cut disputes by 25%.
Where digital inspections help most
For small landlords, the biggest gain isn’t replacing the physical walkthrough. It’s reducing guesswork before and after it.
Useful workflow improvements include:
- Tenant-submitted photos before the visit: You can spot obvious cleaning or repair issues in advance.
- Centralized records: Notes, images, and communication stay attached to the property file.
- Issue triage: Minor items can be grouped separately from bigger repair needs.
- Faster vendor coordination: Once the inspection identifies work, you can move quickly instead of rebuilding the scope from memory.
The strategic value of a virtual first pass
A virtual pre-check won’t catch everything. It won’t replace being on-site to test fixtures, inspect odors, or verify workmanship. But it can tell you whether you’re walking into a light cleaning job or a more involved turnover.
That helps with scheduling. It also changes the tenant conversation. If the tenant uploads photos showing obvious unfinished cleaning, you can direct them to specific corrections before the formal walkthrough. If the unit looks solid, you can focus your visit on condition verification instead of basic housekeeping issues.
In practice, the best system is hybrid. Start with digital intake. Follow with an on-site inspection. Then keep all photos, notes, and post-inspection action items in one place so the turnover doesn’t stall.
Frequently Asked Questions About Pre-Move-Out Inspections
What if the tenant refuses the pre move out inspection
Document the offer, the timing, and the refusal in writing. Don’t argue. Follow your state’s access rules and lease terms, and proceed carefully within the law. If the tenant declines a joint walkthrough, your records become even more important.
Is a pre move out inspection the same as the final walkthrough
No. The pre move out inspection identifies issues while the tenant may still correct them. The final walkthrough confirms the unit’s condition after move-out. Mixing those two steps causes confusion, especially when you later need to explain what changed between the inspection and possession return.
Should I give the tenant a repair list after the inspection
Yes. Keep it itemized and practical. Group the items by room, describe what needs attention, and avoid vague phrases. A tenant can respond to “clean refrigerator shelves and remove all food” much more easily than “kitchen needs better cleaning.”
What if I find more damage after the tenant leaves
That can happen. Furniture may hide floor damage. Appliances may reveal issues only after the unit is empty. The key is consistency. Document what was seen during the pre move out inspection, then document any newly visible post-vacancy conditions separately so your record is clear.
If the condition changed after the pre-inspection or became visible only once the unit was empty, say that directly in your notes.
Do I need the tenant present
That depends on local law and your lease, but having the tenant present is usually better when possible. It reduces factual disputes and gives both sides a shared view of the property condition. If they attend, keep the walkthrough calm and specific. You’re there to observe and document, not negotiate every deduction in real time.
How detailed should my notes be
Detailed enough that another person could pick up the file and understand the issue without guessing. Room name, location in the room, condition observed, and follow-up needed are the minimum. Good notes save you time later when you’re preparing deductions, hiring vendors, or responding to a challenge.
A smoother turnover starts before the tenant leaves, not after. If you want one place to manage notices, tenant communication, rent, maintenance, and organized property records, VerticalRent gives independent landlords a practical way to run that workflow without piecing together multiple tools.
Put this into practice
VerticalRent tools related to this guide
Legal Disclaimer
VerticalRent and its authors are not attorneys, CPAs, or licensed legal or financial advisors, and nothing on this site constitutes legal, tax, or professional advice. The information in this article is provided for general educational purposes only. Landlord-tenant laws, eviction procedures, security deposit rules, and tax regulations vary significantly by state, county, and municipality — and change frequently. Nothing on this site creates an attorney-client relationship. Always consult a licensed attorney or qualified professional in your jurisdiction before taking any action based on information you read here.
Co-founded VerticalRent in 2011, growing it from nothing to 100k landlords and renters. Sold it in 2019, then re-acquired it in 2026 to make it better than ever.


